3DSimEd
Description
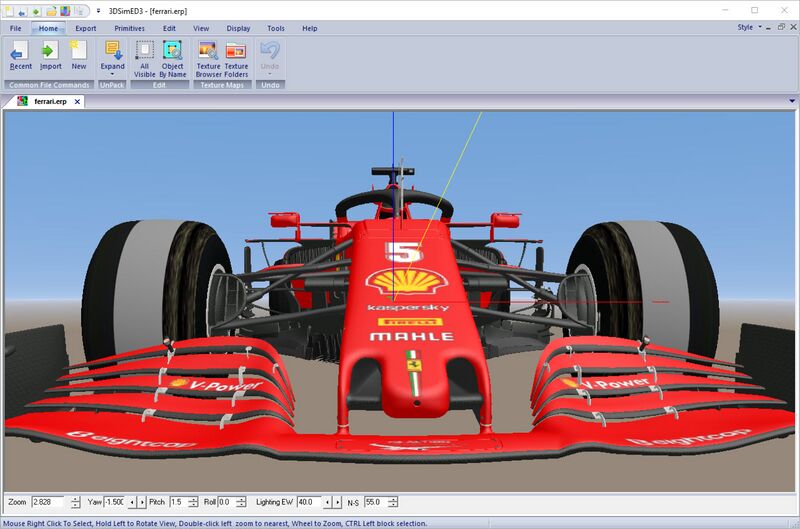
3DSimED is a Windows DirectX application allowing the creation and visualization of models from many racing sim formats.
Models can be exported to Assetto Corsa, Automobilista, rFactor 2 (and 1), GTR2, Race 07, GTL, N2003 and many other games.
Sim formats which can be imported include Grid Legends cars, Grid2019 cars, Forza Horizon 4 cars, F1-2021, F1-2020, F1-2019, F1 2018, F1 2017, Forza 7, Forza Apex, Forza Horizon 3, F1-2016, rFactor2, Assetto Corsa, Grid AutoSport,F1-2010 to F1-2020, NFS Shift, DIRT, GRID, Race 07, GTR Evolution, STCC The Game, GTR2, rFactor, GTL, GTR, Papyrus Nascar 2003 & Grand Prix Legends (GPL), Formula 1 2002 (F1 2002).
3DSimED can also read & write OBJ, FBX, Collada DAE, 3DSMax .3DS, SketchUp .SKP, allowing data to be exchanged with many 3D editors and also applications such as KsEditor the Assetto Corsa editor.
- Description from http://sim-garage.co.uk/
Resources
- 3DSimEd
- Homepage
- App Help (In-app Help Exported to PDF Using Its Own Print Functionality)
- 01 3DSimEd 3.1 - 3DSimEd3 Introduction.pdf - New Features, UI Guide, Ribbon Interface, Context Editing, Edit Face Pane, Vertex Edit Pane, Material Edit Pane, Object Instance Edit Pane, Working With Different Sims
- 02 3DSimEd 3.1 - Function Reference.pdf - File Menu, Home Menu, Export Menu, Primitives Menu, Edit Menu, View Menu, Display Menu, Tools Menu, Help Menu
- 03 3DSimEd 3.1 - User DirectX Shaders.pdf - How To Create User DirectX Shaders
- Editing Guides:
- Help and How To
Notes
- I hope this page helps but I'm writing it from a GTR2-centric perspective. Still, for 3DSimEd, it should still largely apply for other supported sims.
How Tos
Basic Operation
- Importing a Model:
- Import > Navigate to .CAR file > Open
- Viewing a Model:
- Rotate Model: Click and drag
- Zoom: Mouse Wheel
Import a Car to 3DSimEd
- Import (top toolbar)
- Navigate to and select your car's .CAR file
- Ex. GTR2: 14068_G2_BMW_M3GTR.car in GameData\Teams\24H\BMW M3GTR Teams\0815 Motorsport\
- Click Open: The car should display
Select Objects On Car
- Object By Name
- Click on an object: The moves to and highlights the object
- Click OK: Dismisses the object selection dialog and opens an object properties dialong on the right-hand side
Editing Object Properties
- Select an Object: Opens "Object Instance Edit" dialog on right-hand side
Exporting and Repackaging an Updated Car
TODO
Fixing Distorted Mirrors
- Help with 3DSimEd to edit a mod car's mirror and export again - Helpful post with steps and other helpful info in the thread
- Inverted mirrors, how to switch them right? - Another helpful thread
Courtesy of IMC'67:
- Right click on the car object that includes the mirror material and then choose "Object..." followed by the name of the actual object.
- Then choose "Isolate object" (4th button in the second row) from the "Object Instance Edit" panel on the right of your screen which will open the object in a new window.
- Click the "Edit" tab in 3DSimEd's main menu at the top of your screen followed by "Editing Materials".
- Click the MIRROR entry in the Material List and then the "Rescale Tex" button.
- Here you use the "Scale U" and "Scale V" values to change the aspect ratio of the mirror image. U = horisontal and V = vertical.
- When you're satisfied with the aspect ratio, use the "Offset" values to position the image within the mirror.
- Click the "OK" button.
- Click the "Export" tab on the main menu followed by "GTR2" and "Save Model Data".
- Save the object .gmt file to the car's main folder.
- You can later pack all your edited object files into the relevant .gtr files but it's not necessary and much more convenient to have the object files loose in the folder for future edits.
Object Properties Glossary
TODO
Materials
TODO
Shaders
TODO
